The Finger garage door controller is typically mounted at the wall button. The included 3M brand mounting tape is used to secure the controller to the wall, with no screws or other mounting hardware. And, it is worth point out, no wiring is required!
This store requires javascript to be enabled for some features to work correctly.


Shop YoLink’s Smart Garage Door Opener Products
Unsure where to get started?
Follow the 3 steps in our System Builder or pick a Starter Kit
Reduce your risk of home invasion and theft when you Protect Your Perimeter with YoLink
Our line of DIY Smart Garage Products allow you to monitor, control and secure your garage, adding convenience, safety, and property protection

Now, everyone can enjoy the benefits of a smart garage door, without the smart garage door price! For just under $75, you can add smart, remote control to your garage door, with door position monitoring. And our door position sensors come with automatic alerts or reminders if your garage door is left open too long, because, haven't we all, at one time or another, forgot to close the garage door, leaving it open for theft and for intruders (from burglars to raccoons!).
We made upgrading your vintage garage door to smart as easy as possible, with an option that requires NO tools and NO ladders! Use the System Builder section, below, to configure the smart garage approach that's right for you.
To learn more about the unique and advanced technology behind our products, please check out our Discover page.
You can control your garage door controller with the Google and Alexa assistants, as well as with IFTTT and Home Assistant. You can also voice-command Alexa and Google to open/close your garage door! Learn more here.
If you have question, need design assistance, or something else, please fill out the support request form at the bottom of this page, or email us at service@yosmart.com.

Customer Reviews
What customers say about YoLink Garage Products
Videos

Garage Controller 1, 2
Smart Garage Tutorial
YoLink Academy
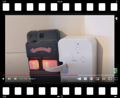
Finger/Garage Controller 2
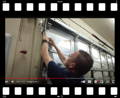
YoLink Garage Door Kit Set Up - EASY Automatic Garage Door Opener
Automate Your Life Tutorials
Finger/Garage Controller 2
YOLINK Smart Garage Door Opener | YOLINK Finger | Simple SMART Garage Door Opener
Todd's World Home Show
Finger/Garage Controller 2
The Easiest To Install Smart Garage Door Opener on the Market
Outlaw CRS Reviews

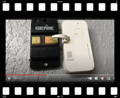
Fob
YOLINK FOBS | Garage Door Opener | TIPS & TRICKSTodd's World Home Show
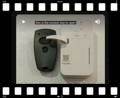
Finger/Garage Controller 2
Coolest Way to Control the Garage Door!
CyberMedics
Garage Controller 1
YoLink Smart Garage Door Sensor & Controller - install and demo
Scott's Smart Home
Step 1. Select Your Hub
Select a hub in this step, or proceed to step 6 to select from one of our convenient starter kits, with everything you need for your smart garage project!
If you are starting your first YoLink system, you’ll need a hub. YoLink devices do not connect to your WiFi or even directly connect to your network. Your YoLink devices communicate directly with your Hub, which is the only device that connects to your network. You have two Hubs to choose from, our original YoLink Hub or our new SpeakerHub. SpeakerHub is an audio hub, capable of playing custom tones/sounds and messages. Spoken messages, in clear text-to-speech-based phrases of your choice.
The SpeakerHub is recommended for your smart garage solution, as it can verbally give you specific information about the status of your garage doors; for example, it can play an attention-getting tone, then "garage door 2 is still open" (if your garage door is left open for too long). Please see the Hub or SpeakerHub pages for additional info.
Step 2. Select Your Garage Door Controller
Which YoLink Controller is best for me?
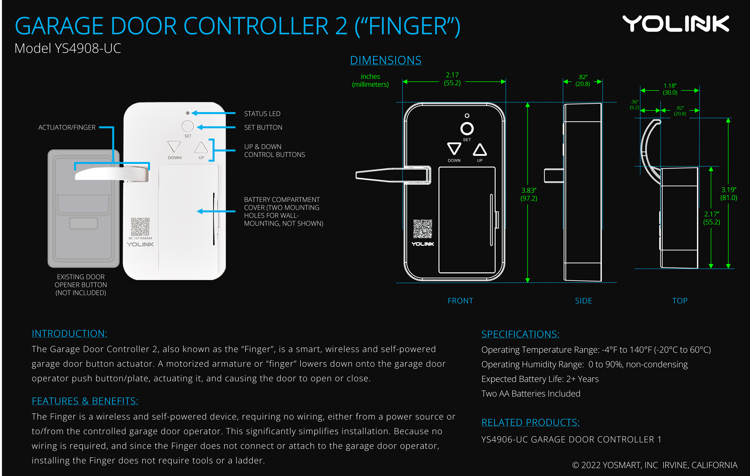
Type: Motorized Button Actuator
Power/Voltage: Two AA Batteries
About: Garage Door Controller 2 (or the Finger) is our "no tool, no wiring, no ladder installation" solution for converting nearly any garage door opener to smart. It has a motorized finger that depresses the door opener button. It's virtually universally compatible with any garage door opener that has a standard mechanical push button or plate. And as an alternative to placing the Finger at the button, you can arrange one of your visor type garage door transmitters on a surface alongside the Finger, and this can be placed at another location, like in a closet. See the videos for examples on both configurations.
It might be best for you if your garage door opener is not compatible with the GDC 1, or if you like doing things the easy way and/or you appreciate not needing to get up on a ladder and work with tools and wires.
Placement and Installation
Step 3: Select Your Garage Door Sensor
It's the job of the garage door controller/opener to open/close your door, but your door sensor is what keeps you informed of the opened/closed status of your garage door. And in the app, the controller is optimized to be "paired with" a door sensor, so don't forget the door sensor! With our sensors and our app, you can be alerted to a door opening, to it closing, and even to it being left open too long.
Our Garage Door Sensor is by far our most popular solution for monitoring the position of garage doors. It's compatible with standard sectional four- and five-panel type doors, and with it's Peel & Stick installation, as our customers have been known to say "it couldn't be any easier to install!"
And we should not forget, garage doors are as much an entry point into your residence or business as the front door is. Secure your home or business when you secure your garage doors! (See our other security products by clicking here).
Step 4: (Optional) Add Control Devices
In addition to the normal ways you already open and close your garage doors, you will now have more options. You will be able to control your garage door from our app, and from Alexa, Google Assistant, IFTTT and Home Assistant (if applicable to you).
But if that is not for you, we do offer three tactile methods of controlling your doors. Our Remote can be Control-D2D paired to your garage doors, and it has a 500' range!
Our AlarmFob and its sister device, the FlexFob offers control of your garage doors and so much more. The AlarmFob has pre-programmed security system buttons, like arm, disarm, and panic, but each button can have a second function, depending on your short or long press. The FlexFob is meant to be more of a blank slate for you and it can perform security functions as well as it can trigger an Alexa routine and IFTTT applets. Sounds like Greek to you? Don't worry, we don't force you to get that fancy, if you don't want. But either fob can be used to control any of your YoLink devices, and even together at the same time. Would you like to lock the door and turn on some lights when you close the garage door, or unlock the door leading from the garage door to the house, and turn on lights as you open the door? Can-do! Gate control? For sure! Of course, arming your security devices or disarming them automatically with your fob button press is super-easy.
Our fobs go on a keychain ring easily. They also come with a two piece bracket that both together can be used to make a car visor clip for the fobs, and one bracket can be used as a wall-mount bracket. Convenient!
Step 5: (Optional) Add Notification Devices/Alarms
As mentioned, you can be notified of a door being left open too long or being opened at the wrong time. If you need something more audible or noticeable, you have some options. Our SpeakerHub, audio hub, can play tones (e.g. siren sound) and tell you, in clear text-to-speech technology style exactly what is happening. Put one on your nightstand and be awoken if the door opens at 2AM in the morning for no apparent reason.
Or, if you want a more burglar alarm level, police-are-on-the-way response, we have one indoor and two outdoor siren options. Refer to the hub or starter kit sections to add a SpeakerHub to your solution, or choose from one or more of our sirens here.
Step 6: (Optional) Starter Kits
Do you like doing things the easy way? We understand. While we spend all waking hours in the world of smart-this and smart-that, you probably just want to make your garage smart and get back to what you were doing before. So, choose from one of our convenient and economically-priced starter kits, with everything* you need to get started!
*Per Step 1, you will need one hub for your system. If you select a kit without a hub, be sure to include a hub in your initial purchase. Any questions? Let us know via the Contact Us section at the bottom of the page.